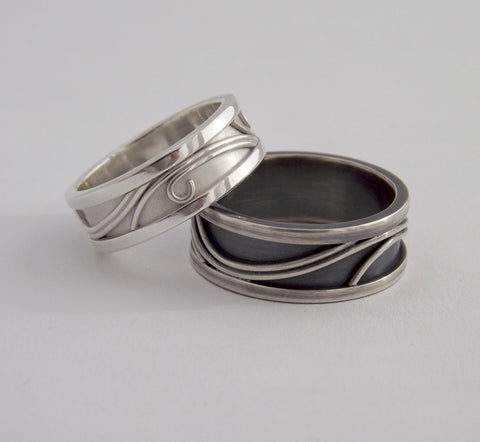
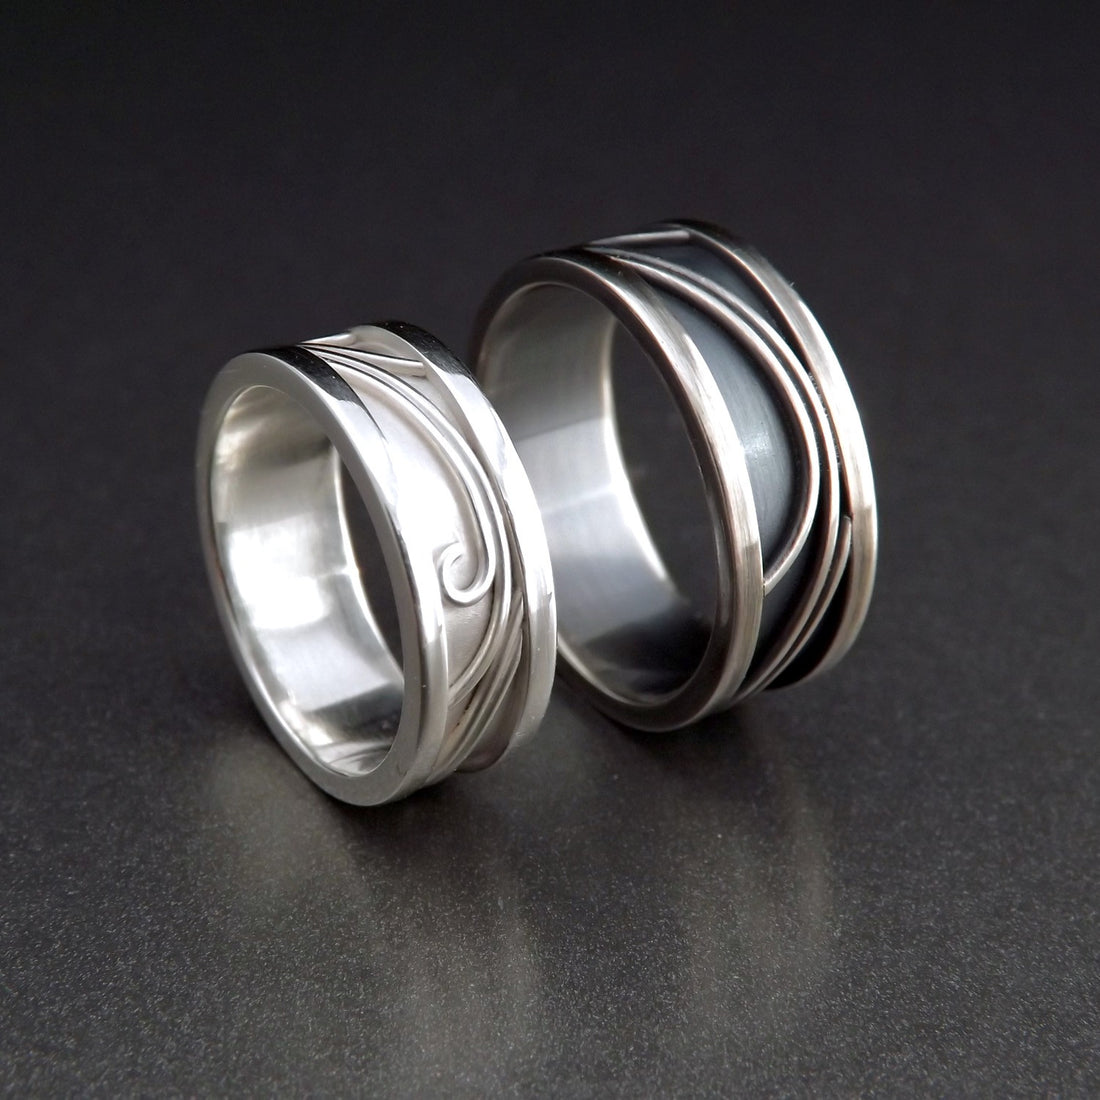

The ring set consists of two bands, each with a slight pattern variation. I love a perfect balance of ornate pattern and clean lines. That was the goal of this design.
Every ring starts with a flat sheet of solid argentium silver. Measured strips are cut from the sheet. Smaller strips are placed on the top and bottom to create the borders. These strips are all carefully fused together using a torch.

One of the great benefits of argentium silver vs. standard sterling, is fusing. Instead of using solder to attach the strips, I can heat the argentium to a precise temperature and it will fuse itself together. No messy solder clean up!
Once the ring bases are fused, the patterned section is created. From thin silver wire I fuse, cut, form, and set up the decorative wires. I try to get them all the same size and shape, then use tweezers to set them in place on the flat ring shanks. When all the wires are arranged, it's time to solder.

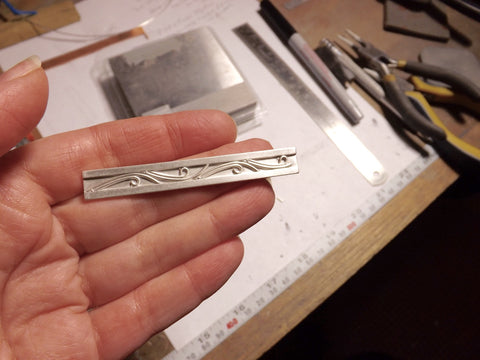
The photo above shows a ring right before it was heated up. Originally I was going to solder the wires on, but decided to fuse them for a cleaner look. With wire you have to be extremely careful not to overheat, as small wires melt easily.
Once the wires were attached, the rings were formed and soldered closed. (I missed a few photos at the end here.) One ring was left silver and the other given an oxidized/brushed finish for contrast. Here's a final shot of the finished set.
You can have a set made just for you, find the details here.